A forum for owners of Yamaha TTR250 trail and enduro bikes!

Members Login
Username 
 
Password 
    Remember Me  
Post Info TOPIC: Stolen TTR recovered after 3 years!


Senior Member

Status: Offline
Posts: 106
Date:
Stolen TTR recovered after 3 years!
Permalink  


Well I'm back. My faithful old TTR was stolen 3 years ago. I truly didn't expect to see it again, thinking it had been parted out and sold or similar. However about 2 months ago I got a call from the Police saying they had located it. Apparently some local scumbag was caught riding it. It had been thinly disguised with a bad paint job etc. I managed to get back to Victoria a few weeks ago to pick it up.

It was as expected in pretty poor shape. Bad paint job, no ignition, electrical in a mess, broken headlight, missing front brake calliper and missing side plastics just to name a few. But it did run and the motor itself sounds ok at this stage. I've decided to try to bring it back to life as I have plenty of time to work on it since retiring.

received_1943301752709167.jpegreceived_208311218553552.jpeg

A couple of pics of the returned product. Pretty sad, considering what it once was. Anyway stripping it down to the engine, frame and wiring and I'll work from there.

So after that introduction, I've got the steering headstem out, it was full of water and the steering bearings were pretty gone. Problem is the bottom one is well and truly stuck on. Any tips on getting it off? I've cleaned it up, tried penetrative oil, bit of heat so far but no luck. Just persistence or is there a specific tool. Nope of my pullers will fit.

20231228_153227.jpg


Attachments
__________________


Super Guru

Status: Offline
Posts: 1386
Date:
Permalink  
 

Wow! That's amazing that it was still in one piece, and that the cops bothered to get it back to you!

There always seems to be random stuff butchered on stolen/recovereds - front brakes? Why?

Sometimes you have to resort to butchery on those stem bearings! Smack the cage with a sharp chisel to break it off and remove the rollers. (Wear eye protection!!) You might be able to heat it with a hot air gun or plumber's blowtorch enough to relax it's grip and tap it off with a (blunt) chisel, but usually this just chips the ridge away 'till there is nothing left to hammer against. I usually resort to shaving it with an angle grinder 'till it is micro thin in one spot, then it relaxes enough to knock off with the , by now really blunt, chisel!

Tip: As you grind away, when the inner race material gets really thin and you are about to break through and hit the stem, it will go blue with the heat. Stop at this point!

Good luck!

__________________


Super Guru

Status: Offline
Posts: 1386
Date:
Permalink  
 

Alternatively, I think you can knock the roll-pin that secures the stem out of the bottom yoke, then knock the stem down through the yoke, pushing the bearing off at the same time. A bit of heat on the yoke helps the aluminium expand but the main danger here is damaging the threads on the top of the stem, particularly if you are using a hammer not a hydraulic press.

__________________


Super Guru

Status: Offline
Posts: 1069
Date:
Permalink  
 

this happened to a friend of mine stolen 3 years later police phoned him they found a scrote riding it never heard what happened to scrote possible out there doing it again

__________________


Senior Member

Status: Offline
Posts: 106
Date:
Permalink  
 

Angle grinder did the job eventually, but it fought me all the way. I did mark it a bit, but not too bad.

__________________


Super Guru

Status: Offline
Posts: 1386
Date:
Permalink  
 

Well done! There is plenty of material on the stem and the bearing won't go out of shape unless you've made a REAL big groove!


__________________


Senior Member

Status: Offline
Posts: 106
Date:
Permalink  
 

Started on the forks yesterday. All off and in reasonable condition apart from the seals. The clip holding the dust seals in had totally rusted and took quite a bit to get out on one, the other wasn't too bad. Fork oil was very manky and there was no air in there either.

Ordering new seals, covers, oil and clips. 10 or 15 weight oil?

20240108_175401.jpg


Attachments
__________________


Veteran Member

Status: Offline
Posts: 99
Date:
Permalink  
 

 i go with the 10W and 10mm higher than what the manual says. clickers set at middle , (recommended by a suspension Guy) as its still compliant while stopping most of the dive without air pressure. 

another one of those questions that will have several answers based on rider preference.    


__________________


Senior Member

Status: Offline
Posts: 106
Date:
Permalink  
 

Well after a few months, she's slowly coming back to life. Stripped down to engine, frame and wiring.


Wiring was a mess, cut and chopped, safety switches bypassed, key barrel and  ignition removed, number plate light holder and lights gone etc. Why? Who knows.

Anyway, instead of buying a whole new wiring loom, I just decided to repair it.

So, new turn signals and wiring. New stop/tail light wiring and new lens. New number plate holder, lighting and wiring.

Still needs a new head light, but having trouble sourcing an original so it looks like an Honda XR might fit with some modifications. I did see an original TTR250 headlight on Ebay, but it turned out to be much smaller than mine.


Front forks have been rebuilt. New bushes, seals, covers and oil, and topped off with new fork gators, which again had been removed??

New handle bars, originals had been bent. New grips. 

Head stem bearings replaced.

New front brake calliper and pads. Again it had been removed. Why??

New rear brake pads as they were rather unsurprisingly almost non existent.

New chain guard, also missing.

New foot pegs, they were bent and rusty.

New rear wheel bearings.

I've put the original exhaust back on (lucky I kept it) as they had ruined my KT-P after market pipe. They'd cut the conical end off.

Carburettor had to be cleaned and rebuilt and new air filter.

New fuel tap and fuel lines.


Surprisingly at this stage, ive only had to change the oil and filter, spark plug and adjust the valve clearance. It seems to run well so far. Unbelievably the oil was actually quite clean, I guess they changed it.


The worst part was removing the ****ty spray paint they had literally covered the whole bike with.

I managed to remove it from the visible parts of the frame and touched up the best I could without stripping it completely and having it totally resprayed.


Getting it off the plastics was horrendous and has unfortunately left them a bit worse for wear cosmetically. I don't know it there's anything I can do about that????


What it still needs.

New tyres, front and back

Head light

Couple of mirrors

Original type front fender (looks like an after market WR type on it atm)

Some sort of instrument cluster/speedo. (It originally had a Vapor Trail tech type)

Sticker/Decal kit


Biggest problem is sourcing the side plastics. Seem to be as rare as hens teeth and exorbitantly expensive. Any alternative??

20240313_123148.jpg20240313_123335.jpg


Attachments
__________________


Senior Member

Status: Offline
Posts: 106
Date:
Permalink  
 

Managed to get an after market speedo/Instrument cluster that looks pretty much like the original. Or course it came from China so we shall see what the quality is like over time.

It bolted right on through the original bolts, so it seems to be a pretty good fit. Only issue so far it that it came with a 9 pin plug which wasn't compatible with the original wiring and plugs.

I've got a owners manual and repair manual, but I actually couldn't find a circuit diagram for the instrument cluster? Did I miss it?

After a bit if testing ithink I worked out what the wiring was for each part, but I'd like some confirmation if anyone knows.

Black and Blue wires = Instrument cluster back light.

Sky blue and Brown = Neutral Light.

Black and Yellow = High beam

Brown and BrownYellow = turn signals

After connecting everything up, it all seems to work correctly except the turn signals. With those pins connected as above I get a permanent solid light on the display all the time  regardless if the turn signals are operating or not.  Clearly I have something wired incorrectly.

Any help would be appreciated.

20240404_175714.jpg


Attachments
__________________


Senior Member

Status: Offline
Posts: 106
Date:
Permalink  
 

So no ideas on the wiring for the instrument cluster??

__________________


Super Guru

Status: Offline
Posts: 2651
Date:
Permalink  
 

Not from me i'm afraid, anyone ?


__________________

totallyttrs.com


Super Guru

Status: Offline
Posts: 8565
Date:
Permalink  
 

I have a lot of photos of the TTR wiring loom, connectors and components but I haven't named them very well. It is not clear on many whether they are from a blue or white TTR sadly.

I knew what they all were back in the day when I was restoring/refurbishing TTRs on an almost full-time basis but the photos have since fallen into disuse cry

I found a photo of the rear of the speedo warning light binnacle from a UK/EU specification blue TTR and I am pretty sure that I have sussed the wiring. See below:

speedo connector on warning light binnacle 001.jpg

Looking at another photo of the various connectors in that area of the loom, there is two-pin connector block to the left of the photo below with blue and black wires which I am fairly sure light the main speedo.

speedo connector 2.jpg


__________________

Exeter, Devon, UK

http://www.ttr250.com  - The one and only dedicated TTR250 FAQ! 
 

TIP: For easy viewing bookmark the "Recent Posts" view - http://ttr250.activeboard.com/p/recent/ 


Senior Member

Status: Offline
Posts: 106
Date:
Permalink  
 

Thanks for the reply.

Looks like the top photo of the instrument cluster must be from a different model to the blue tr250 I have. The bottom photo looks like the wiring I have. I'm assuming the wire colours from 6 pin connector on the botton should match the top ( signals, neutral, high beam) if the were the same??
The two pin connector looks like you say the backlight to the speedo.
Does the original speedo have a temperature light?


-- Edited by Base on Wednesday 10th of April 2024 12:12:21 AM

__________________


Super Guru

Status: Offline
Posts: 8565
Date:
Permalink  
 

Base wrote:


Does the original speedo have a temperature light?


Nope.


Attachments
__________________

Exeter, Devon, UK

http://www.ttr250.com  - The one and only dedicated TTR250 FAQ! 
 

TIP: For easy viewing bookmark the "Recent Posts" view - http://ttr250.activeboard.com/p/recent/ 


Senior Member

Status: Offline
Posts: 106
Date:
Permalink  
 

Hmmm, ok, dont suppose you have any better pictures of the male and female 6 pin connectors?

__________________


Super Guru

Status: Offline
Posts: 8565
Date:
Permalink  
 

Best that I can do....

Which wires are you stuck on?


Attachments
__________________

Exeter, Devon, UK

http://www.ttr250.com  - The one and only dedicated TTR250 FAQ! 
 

TIP: For easy viewing bookmark the "Recent Posts" view - http://ttr250.activeboard.com/p/recent/ 


Super Guru

Status: Offline
Posts: 2651
Date:
Permalink  
 

Base wrote:

Hmmm, ok, dont suppose you have any better pictures of the male and female 6 pin connectors?


 Can you post photos of your speedo and the wires you are stuck on ?


__________________

totallyttrs.com


Senior Member

Status: Offline
Posts: 106
Date:
Permalink  


Just trying to workout what the individual wires are for in the six pin female plug coming from the bike.

I have 6 coloured wires

Sky blue, Brown, Black, Yellow, Brown and Brown-Yellow

Looking at the wires coming from the speedo/Instrument cluster per your photo to the male connector are...

Orange and white - Neutral Light
Green and dark brown - Indicators
Black and Yellow - High beam.

They don't match colour wise, so what connects to what?

The Black and Yellow look like the High Beam ok.

The others????


__________________


Super Guru

Status: Offline
Posts: 8565
Date:
Permalink  
 

As I said, all my photos are of UK/EU wiring looms so I guess I am not going to be of any help.

You need someone with an Oz bike to have a look at theirs for you.

Any volunteers?


__________________

Exeter, Devon, UK

http://www.ttr250.com  - The one and only dedicated TTR250 FAQ! 
 

TIP: For easy viewing bookmark the "Recent Posts" view - http://ttr250.activeboard.com/p/recent/ 


Senior Member

Status: Offline
Posts: 106
Date:
Permalink  
 

Was hoping they'd be the same 😮‍💨Screenshot_20240410_175518_Samsung Internet.jpgScreenshot_20240410_175526_Samsung Internet.jpg


Are these photos of the same plug just flipped over or are they different. One seems to have a sky blue wire and the other doesn't?


-- Edited by Base on Wednesday 10th of April 2024 09:47:35 AM

Attachments
__________________


Super Guru

Status: Offline
Posts: 8565
Date:
Permalink  
 

Same plug.

__________________

Exeter, Devon, UK

http://www.ttr250.com  - The one and only dedicated TTR250 FAQ! 
 

TIP: For easy viewing bookmark the "Recent Posts" view - http://ttr250.activeboard.com/p/recent/ 


Senior Member

Status: Offline
Posts: 106
Date:
Permalink  
 

Well maybe I have git it wired correctly. After some testing with a spare LED light, I noticed the turn signal would work correctly with it but not the speedo display cluster turn signals. After much frustration I pulled the globe out of the speedo display cluster to discover it wasn't an LED but a normal bulb.
So I'm figuring that as the indicators that are fitted areLED and not the original bulbs, perhaps the is a conflict between the 2 as they are in the same circuit. A resistance difference issues?
I guess I'll just replace the bulb in the display with an LED and hopefully it will solve the issue....

__________________


Veteran Member

Status: Offline
Posts: 99
Date:
Permalink  
 

the indicator bulb is wired across the left and right circuit's when turning on an indicator it earths through the opposite side . by fitting led indicators the resistance is too high to light up the bulb in the dash , it may work with resistors fitted , putting an led in the dash socket may work but only for one side as they are polarity conscious (like a diode) . the best bet May be  stay with a normal bulb and add resistors to each side .  


a plan B is get a three-pin flasher unit and wire up the dash indicator with earth on one side and power from the third pin when the lights are flashing.  ( you can use an led bulb then ) 


__________________


Senior Member

Status: Offline
Posts: 106
Date:
Permalink  
 

Thanks for the reply TtBoof.

All was looking good with the LED replacement bulb in dash. Everything worked as it should.

Until I actually started the engine.

Then I got a constant flashing on the dash, whether the indicators were on or off. Not ideal.

The 3 pin flasher unit, will it solve the problem? Looks like the easiest option.

__________________


Veteran Member

Status: Offline
Posts: 99
Date:
Permalink  
 

that's strange, might be worth taking the dash bulb out and see if it comes good, and it works left right with the switch.

not sure why it would do that. only thing i can think of is the flasher unit an led specific one, if so, there may be enough draw with the increased voltage with the engine running/charging for the dash light to cause the unit to flash. But that would need something to be wired a tad wrong.  

if it comes good with the bulb out ,  id go with the 3 in and wire the indicator off the third pin. easy for me I'm an auto elec by trade . would be easy to sort in person. smile 
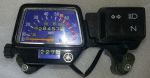
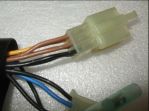
it should work with the factory wiring mine does with a couple of resistors  .


it's simple things like this that makes my head hurt biggrin


__________________


Veteran Member

Status: Offline
Posts: 99
Date:
Permalink  
 

I've taken brain's pic for this reply. 

if you were to go with the three-pin flasher unit , you would need to cut the wires going to the indicator bulb earth one , extend the other and connect it to the third pin on the unit . you may need to swap the wires over to get the LED to work (you may have one that works polarity's though) . and the other two connections to the unit its easiest to make up male /female leads to plug into the original two pin plug.

I'm still thinking something's not quite rite with your bikes wiring. 


speedo connector on warning light binnacle 001.jpg


__________________


Senior Member

Status: Offline
Posts: 106
Date:
Permalink  
 

Yes I'm thinking the same. Are the wires in the 6 pin connector coming from the wiring loom supposed to match in colour those coming from the Instrument cluster?

When I got my TTR it had a Vapor Trail tech speedo, never had the original, so I don't know what colour the wires were originally on that or if they matched what was coming from the bike wiring loom.

When I got this bike back after it had been stolen, the Trail tech had been removed and the wires cut. So it hasn't left me much to work with trying to connect this new China Speedo, which of course has completely different coloured wiring and had a nine pin connector. Which of course didn't come with any documentation.

In fact the whole wiring had been butchered. I thought about a complete new loom, but in the end I just decided to repair it. This has been the only part I've had difficulty with..


If you scroll up through the thread I have identified what I thought the wires were coming from the loom.

Cheers


-- Edited by Base on Thursday 18th of April 2024 12:22:36 PM

__________________


Senior Member

Status: Offline
Posts: 106
Date:
Permalink  
 

Got a chance to look at the wiring again and think I've finally got it sorted. Was apparently an issue with LED resistance etc. After trying multiple types I found one that worked. The original wiring I had identified was correct.


-- Edited by Base on Wednesday 24th of April 2024 10:20:25 AM

__________________


Senior Member

Status: Offline
Posts: 106
Date:
Permalink  
 

Only thing I need to source now are the plastic side panels. Expensive and rare as hens teeth it seems.

__________________
Page 1 of 1  sorted by
 
Quick Reply

Please log in to post quick replies.


Create your own FREE Forum
Report Abuse
Powered by ActiveBoard