A forum for owners of Yamaha TTR250 trail and enduro bikes!

Members Login
Username 
 
Password 
    Remember Me  
Post Info TOPIC: The Tusk Enduro Kit


Senior Member

Status: Offline
Posts: 123
Date:
Tusk Enduro Kit
Permalink  


Kind of funny. I was at the DMV to register my bike; but the previous owner's papers were nontransferable. I then called the PO up and told him the situation so today he gave me the registration so I can register the bike. We got talking and I told him that I had plans for making the bike road legal. He thought for a moment, went into his garage and pulled out a brand-new Tusk enduro lighting kit! Funny how it worked out, but I now got a brand new Tusk kit for $40 smile


__________________


Super Guru

Status: Offline
Posts: 1324
Date:
Permalink  
 

yamaha42 wrote:

Kind of funny. I was at the DMV to register my bike; but the previous owner's papers were nontransferable. I then called the PO up and told him the situation so today he gave me the registration so I can register the bike. We got talking and I told him that I had plans for making the bike road legal. He thought for a moment, went into his garage and pulled out a brand-new Tusk enduro lighting kit! Funny how it worked out, but I now got a brand new Tusk kit for $40 smile


 Score!


__________________

2000 TT-R250M-

Spoiler


Senior Member

Status: Offline
Posts: 123
Date:
Permalink  
 

Help! How do you hook up the 3 headlight wires to the headlight? also, I hooked up the battery connections, turned it on, but no horn, no signals, and no headlight since i dont have it hooked up yet. all other items are hooked up. does the bike have to be running for them to work?

__________________


Super Guru

Status: Offline
Posts: 8565
Date:
Permalink  
 

Hi Dave

Are you sorted and, if not, how far have you got?

The pic below is from a UK loom. Do you have the 4-pin headlight connector arrowed and, if you do, are any of the connectors live?

Brian

Light switch - green wire .jpg


__________________

Exeter, Devon, UK

http://www.ttr250.com  - The one and only dedicated TTR250 FAQ! 
 

TIP: For easy viewing bookmark the "Recent Posts" view - http://ttr250.activeboard.com/p/recent/ 


Senior Member

Status: Offline
Posts: 123
Date:
Permalink  
 

My connector to the headlight has 3 pins. I will get pictures up of my setup ASAP. Also, do i take out my old light switch near the clutch lever? obviously I have to because the signal/headlight/horn button replaces it, but i'm just confused what to do with the loose connection after i take it out. There is no wiring in the tusk kit that goes into it.

__________________


Super Guru

Status: Offline
Posts: 8565
Date:
Permalink  
 

yamaha42 wrote:

My connector to the headlight has 3 pins. I will get pictures up of my setup ASAP. Also, do i take out my old light switch near the clutch lever? obviously I have to because the signal/headlight/horn button replaces it, but i'm just confused what to do with the loose connection after i take it out. There is no wiring in the tusk kit that goes into it.


I am sorry Dave but I don't think I am going to be able to help much as I think your wiring loom and switches are different to UK models - sorry!

Hopefully we have a knowledgeable fellow countryman of yours on the forum that can help wink

Brian


__________________

Exeter, Devon, UK

http://www.ttr250.com  - The one and only dedicated TTR250 FAQ! 
 

TIP: For easy viewing bookmark the "Recent Posts" view - http://ttr250.activeboard.com/p/recent/ 


Super Guru

Status: Offline
Posts: 1324
Date:
Permalink  
 

If you take some pictures of your harness and let me know any useful info, I'll see what I can do from here.

Jarrah


__________________

2000 TT-R250M-

Spoiler


Senior Member

Status: Offline
Posts: 123
Date:
Permalink  
 

Disregard...I forgot to hook up the tusk killswitch. Works now. Now I must conquer the headlight! to be continued

__________________


Super Guru

Status: Offline
Posts: 8565
Date:
Permalink  
 

Vernon Thornton has just sent me a link to the workshop manual (your responsibility to check its safe) for a US model TTR - see here - thanks Vernon!

There is a coloured wiring at the end of the manual which I haven't examined but should be the same connections as your TTR.

Good luck!

Brian


__________________

Exeter, Devon, UK

http://www.ttr250.com  - The one and only dedicated TTR250 FAQ! 
 

TIP: For easy viewing bookmark the "Recent Posts" view - http://ttr250.activeboard.com/p/recent/ 


Senior Member

Status: Offline
Posts: 123
Date:
Permalink  
 

Thanks ttrfan but I have got ahold of a manual

__________________


Senior Member

Status: Offline
Posts: 123
Date:
Permalink  
 

Everything is hooked up except my front blinkers. I haven't decided where to place them yet. I do no have any fancy mounting brackets like you guys have so I may drill holes in the headlight shroud and place them there. Is that a good or bad idea?

__________________


Super Guru

Status: Offline
Posts: 1324
Date:
Permalink  
 

Reply Quote 
More indicator.png
Edit Post
Delete Post
Printer Friendly

yamaha42 wrote:

Everything is hooked up except my front blinkers. I haven't decided where to place them yet. I do no have any fancy mounting brackets like you guys have so I may drill holes in the headlight shroud and place them there. Is that a good or bad idea?


 Bad idea, the plastic may crack or melt. Also, when you crash it or brush-up against trees etc. it will break the headlight shroud.

If you have trouble, try this...

Buy two engine brackets, part number 19 HERE for $2.74 each then using a grinder, cut to fit as shown below.

This was the engine bracket (the one that holds the rear brake reservoir line) before...

Marked for cutting (I drew the lines below in Microsoft paint paint obviously)...

574746_542519775781498_779868557_n.jpg

After..

At this point you may want to weld a nut above.gif 
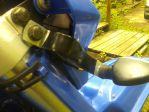
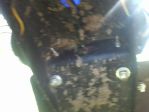
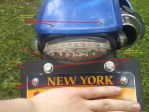
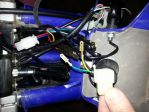
(left side hole in picture above) on the inside of the brackets so you do not have to use a nut and bolt (not essential).

Fitted..

Or you could buy the clamp type and clamp it to your forks but may cost a little more. I am pretty sure that you would have a hard time though with the fork guard in the way. They look like in the picture below...

$(KGrHqVHJFIE92EZwDTUBPk5Fwt16w~~60_12.jpg

Jarrah


__________________

2000 TT-R250M-

Spoiler


Senior Member

Status: Offline
Posts: 123
Date:
Permalink  
 

I don't have a grinder or a welder :( I will think of something but i'm glad I didn't drill into my headlight cover

__________________


Senior Member

Status: Offline
Posts: 123
Date:
Permalink  
 

I wound up using Liscence plate mounting brackets to mount my front blinkers.

__________________
LRJ


Senior Member

Status: Offline
Posts: 158
Date:
Permalink  
 

I'd like to see pictures of how it works and looks, if you can get around to it.

__________________

Take time to play.

Central California, U.S.


Senior Member

Status: Offline
Posts: 123
Date:
Permalink  
 

Ask and you shall receive. Anything in particular you would like to see? I will take pictures of my setup tomorrow, so stay tuned!

__________________


Senior Member

Status: Offline
Posts: 123
Date:
The Tusk Enduro Kit
Permalink  


Hello fellow TTR people. I know I have made a post with a similar title, but I want this to be my "formal" installation post. The Tusk Enduro Kit comes with: Front & rear blinkers, horn, on/off switch, multi-function switch (horn, blinkers, high/low/off), signal relay, power wire hookup, rear-view mirror, plastic brake light fender, and a brake pressure switch.


The kit does not come with mounts for the front blinkers, so I used these brackets for an ATV licence plate holder. They were originally bent in a circle to wrap around a grab bar but I flattened them out for this purpose. It is mounted to the triple-clamp bolt as seen here:

ablinker.jpg

Here is a shot of the front of the bike:

afblinkers.jpg

Here is the majority of the Tusk wiring harness, and a nice view of my front setup. I hope you can see the headlight wires which I have spliced into the Tusk kit. (sorry for bad quality!)

awires.jpg

And this is the wire which runs to the rear of the harness. It's kind of hard to see but I have it ran through the gas tank mount and zip-tied to a wire in the original harness.

awire.jpg

And this is the "back" of the Tusk harness. It has the brake light, brake switch, blinker connections, and power connections (as well as my modded airbox hole)

airbox.jpg

Power wires from the battery:

apower.jpg

Here is  the brake pressure switch which replaces the factory banjo bolt:

aswitch.jpg

The horn, mounted to the brake line guide. To the left, you can see a black box with a yellow sticker which is the blinker relay. I mounted that to the odometer bracket. 

ahorn.jpg

The kit does not come with a license plate holder either. This is the metal license plate holder which my front blinker mounts came with. I had to drill holes myself to make it all work. The top two little bolts hold the tusk brake fender to the bike's blue fender. The top two big bolts hold the metal plate to the tusk plastic brake fender, and the bottom two little bolts hold the license plate to the plate holder. Sorry I will get better at paint one of these days!

aplatemod.jpg

Here is an undershot (blurry I know!)

amount.jpg

And here are my controls!

ahandlebar.jpg

And that's it! I hope you guys find this useful/interesting and if you need clearer pictures or explanations don't be afraid to ask!


Attachments
__________________


Member

Status: Offline
Posts: 8
Date:
Permalink  
 

Which blinkers did you use?


__________________
LRJ


Senior Member

Status: Offline
Posts: 158
Date:
Permalink  
 

Thank you, Swamper. I have never seen the Tusk kit before. It looks very nice. I like that the rear blinkers are in close to the rear fender, without any "stalks" to break. I have the Baja kit, myself, and I have broken the left rear blinker stalk, so I have splinted it with wood sticks and tape. I will have to look into seeing if the Tusk rear blinkers can be ordered separately.

Larry

__________________

Take time to play.

Central California, U.S.


Senior Member

Status: Offline
Posts: 123
Date:
Permalink  
 

TTRSwamper wrote:

Which blinkers did you use?


 The Tusk Enduro Kit comes with all 4 blinkers. I noted everything included in the kit in my intro wink


__________________


Member

Status: Offline
Posts: 14
Date:
Tusk Lighting kit ***HELP***
Permalink  


I have a 1999 ttr250, im in the process of making it street legal. I started installing the tusk lighting kit but there are a few things im not sure about.


1. does this kit replace the existing  headlight switch and on/off kill switch?

2. If it does replace them how do I eliminate the stock switches and convert over to the tusk kit.

3. I am clueless when it comes to electrical work but after reading many reviews about this kit I thought it was something I could handle. 


Please can someone help me with this, email me directly please   jt119923@hotmail.com    and if possible a phone number.


Thank you


__________________


Super Guru

Status: Offline
Posts: 1324
Date:
Permalink  
 

Hello Ageless Mind and welcome to the forum

If you leave more details or a link to the specific Tusk lighting kit, I can have a look at it for you.

Jarrah


__________________

2000 TT-R250M-

Spoiler


Member

Status: Offline
Posts: 14
Date:
Permalink  
 

I purchased a complete kit, im not sure what other details to give. So frustrated right now.


__________________


Super Guru

Status: Offline
Posts: 1324
Date:
Permalink  
 

Was it this one- http://www.ebay.com.au/itm/Tusk-Motorcycle-Enduro-Lighting-Kit-Yamaha-TTR250-1999-2006-/181190849091?pt=US_Car_Lighting&hash=item2a2fd0f243


__________________

2000 TT-R250M-

Spoiler


Member

Status: Offline
Posts: 14
Date:
Permalink  
 

Yes sir, mine does not have the battery assist


__________________


Super Guru

Status: Offline
Posts: 1324
Date:
Permalink  
 

Do you have the wiring harness or is that not included in your kit? Are the details the same as below?

Kit comes complete with wiring harness, LED mini-stalk front turn signals, LED flush mount rear turn signals, flasher relay, horn, hydraulic brake switch, LED taillight/brake light, dual sport folding mirror, On/Off switch, and control switch.

Jarrah


__________________

2000 TT-R250M-

Spoiler


Member

Status: Offline
Posts: 14
Date:
Permalink  
 

I have the wiring harness


__________________


Member

Status: Offline
Posts: 14
Date:
Permalink  
 

i understood how to wire in the new control switch, but the instruction say nothing about eliminating the existing STOCK headlight switch. Also the kit includes a new kill switch, yet the bike has a combo kill switch start switch. Do i need to use the NEW kill switch or can I stick with the stock one? I then question if the tusk kit is set up to use the new kill switch how do I go about using stock.

jim

__________________


Super Guru

Status: Offline
Posts: 1324
Date:
Permalink  
 

It may be easier if you take a photo of the wiring harness and the switches with the connections spread apart so we can have a look at it. It should become apparent by looking at it?confuse

If you want to upload a pic from your computer, have a look at the bottom of your screen while writing a message. It will have a tab labelled Attach Image(s)

Attached Files

Click on the ''browse'' tab to find the picture of the kit and upload it. Once it is uploaded to this site (wait until it says ''insert''), you can use the insert the image into the screen rather than have it as an attachment.

Hope that makes sense?

Jarrah 


__________________

2000 TT-R250M-

Spoiler


Super Guru

Status: Offline
Posts: 1324
Date:
Permalink  
 

Have a look at these videos, not sure if it helps but it may? Click on the link, scroll down and click the videos- http://www.rockymountainatvmc.com/p/1156/26724/Tusk-Motorcycle-Enduro-Lighting-Kit?term=ttr250

Jarrah


__________________

2000 TT-R250M-

Spoiler


Member

Status: Offline
Posts: 14
Date:
Permalink  
 

I have watch them several times, they give a general idea on how to install, I have been all over the web and youtube looking for answers and I have tech support request into rockymountain atv.

__________________


Super Guru

Status: Offline
Posts: 1324
Date:
Permalink  
 

See if this helps- http://www.rockymountainatvmc.com/docs/Enduro%20light%20kit%20instructions.pdf

It says- (refer to wiring diagram that came with the harness). If you have it, take a picture of it so we can help. Otherwise we will be ''stabbing in the dark'' so to speak, unless of course someone has installed the Tusk kit WITH the WIRING HARNESS. confuse

Jarrah


__________________

2000 TT-R250M-

Spoiler


Member

Status: Offline
Posts: 14
Date:
Permalink  
 

20131222_105454.jpg


Attachments
__________________


Super Guru

Status: Offline
Posts: 2608
Date:
Permalink  
 

The Tusk lighting modification has been sorted before, or so it seems.

Yamaha42 had a problem that was supposedly sorted by Jarrah. confuse

Try clicking HERE for the page.

Martyn


__________________

You're never too old to learn something stupid

East Budleigh. Devon


Member

Status: Offline
Posts: 14
Date:
Permalink  
 

The issue is: what to do with the stock headlight and kill switches. Does the tusk equipment replace them? Do i keep them connected? tucked away and hidden. To me it does not make sense to install ANOTHER switch if it not replacing.

__________________


Super Guru

Status: Offline
Posts: 1324
Date:
Permalink  
 

You have the same diagram as here- http://www.rockymountainatvmc.com/docs/wire%20diagram.pdf

Not sure why though as that diagram mentions nothing about a start switch which does not seem right. I would suggest to check if the wiring harness includes a start switch, if not you will have to wire it separately.

Plug the Tusk Kill switch into the yellow and black (yellow being the power feed side).

It would make sense that the Tusk control switch replaces the original light switch.

Jarrah


__________________

2000 TT-R250M-

Spoiler


Member

Status: Offline
Posts: 14
Date:
Permalink  
 

In the garage Working on it now, will up date shortly

__________________


Super Guru

Status: Offline
Posts: 1324
Date:
Permalink  
 

Ageless Mind wrote:

In the garage Working on it now, will up date shortly


 Too easy, I'll be waiting for the verdict. The most important thing to check is that you have a start switch. I am not sure if they retain the original harness for this or not

Yamaha42 did actually use the Tusk wiring harness but only mentions it half way through the thread, see here- http://ttr250.activeboard.com/t54445322/the-tusk-enduro-kit/

Jarrah


__________________

2000 TT-R250M-

Spoiler


Member

Status: Offline
Posts: 14
Date:
Permalink  
 

Almost everything is working, but the headlight.

__________________


Member

Status: Offline
Posts: 14
Date:
Permalink  
 

Headlight is working. It seems that when I disconnect the stock light switch the power had no place to go. So thinking about it, the headlight is either or off which led me to trick the system to think that it is on to supply power to the new switch, This worked.
Sometimes its a matter of having another person to communicate with to help make sense of things. Thank you very much, I will post an update once the bike is back together. :)

Jim

__________________


Super Guru

Status: Offline
Posts: 1324
Date:
Permalink  
 

Glad you got it sorted Jim

Please take as many pictures as you can, especially the headlight switch. This will help us in the future to verify the installation.

Cheers

Jarrah


__________________

2000 TT-R250M-

Spoiler


Member

Status: Offline
Posts: 14
Date:
Permalink  
 

20131222_192354.jpgMany of the pictures I've seen have been accurate. The rocky mountain video for the control switch hook up is spot on. What I found when connecting the headlight was that my headlight power wires are DUAL GRAY connected to the BLACK control switch wire. GROUND to GROUND, YELLOW (high beam) to BLUE control switch wire and GREEN to WHITE control switch wire.
Confusion set in when I was left with stock headlight switch dangling. With my TTR (1999) when i disconnected the stock headlight switch I opened the circuit to fix it I cut the PLUG IN part of the switch off, added some disconnects to create jumper (see picture attached).
My other misunderstanding was the TUSK ON/OFF switch. This switch is the lighting system on/off switch NOT a kill switch for the bike. I was thrown off by wording on the switch itself that read KILL SWITCH.
The rest of the install went well, I took my time with routing I have a bit of OCD when it comes neatness. The only thing I did not like about the harness was to much wire in one spot and not enough in another. Rear turn signal wires need to be about 6 inches longer. Tail light/ brake light wires about a 12 inches shorter and an additional 4-6 inches on the battery wires.

Happy to answerhappy to answer  any questions to assist with anyone else doing an install as it was done for me. 

My bike is the USA version, don't know if that makes a difference. 

Jim


Attachments
__________________


Member

Status: Offline
Posts: 14
Date:
Permalink  
 

20131223_133318.jpg20131223_133326.jpg20131223_133339.jpg20131223_133349.jpg20131223_142545.jpg20131223_142557.jpgIhi hope the pictures will be in order in which I speak about
1. In regards to the headlight, I removed the PLUG IN, to use the male connectors thus eliminating cutting of the headlight wires. I did cut the tusk wiring to add the appropriate female connectorand wrapped all exposed metal with electrical tape.
2. Is the mounting location for the relay. At the odometer bracket location.
3. Horn mount location, I went with this side only because majority of the wire was here
4. Wiring tucked in with the stock harness and along the frame then neatly around the CDI and air intake. I did some notching of the airbox for neatness
5 just a shot of the underside rear fender.
With the TUSK on/off switch in the OFF position; the headlights function with the bike ignition in the on position and will shut off when the key is turned to off.

Again thank you Jarrah for your ear and input.


Attachments
__________________


Super Guru

Status: Offline
Posts: 1324
Date:
Permalink  
 

Ageless Mind wrote:


My bike is the USA version, don't know if that makes a difference. 

Jim


 Yep, it does. The US version has an On/Off switch for the headlight along with other differences.

Thanks for the update Jim, very good.

Jarrah


__________________

2000 TT-R250M-

Spoiler


Senior Member

Status: Offline
Posts: 123
Date:
Permalink  
 

I spliced the 3 headlight wires into the existing headlight harness with my Tusk kit. It works great! Also, may I ask which state you're from?

__________________


Member

Status: Offline
Posts: 14
Date:
Permalink  
 

I'm in michigan


__________________


Senior Member

Status: Offline
Posts: 116
Date:
RE: The Tusk Enduro Kit
Permalink  


yamaha42 wrote:
TTRSwamper wrote:

Which blinkers did you use?


 The Tusk Enduro Kit comes with all 4 blinkers. I noted everything included in the kit in my intro wink


i know this is an old thread, but I just purchased the exact same kit. How do the rear blinkers stay attached? It looks like they stick together with some sort of adhesive rather than bolt on. Wouldn't this cause durability issues while riding in the tight woods?


__________________


Senior Member

Status: Offline
Posts: 116
Date:
Permalink  
 

....bump.....

__________________


Senior Member

Status: Offline
Posts: 123
Date:
Permalink  
 

Yes, they are held on by an adhesive. So far, they are holding up great. My only issue right now is the exhaust blows onto the right blinker, covering it in carbon. Because they do not stick out to the sides, I would not worry about the blinkers being ripped of at all.

__________________


Senior Member

Status: Offline
Posts: 116
Date:
Permalink  
 

Yamaha42, does your key switch work with this tusk kit. I just installed mine and the bike will have full complete power whether the key is off or on. Did u just leave yours like that? Or did u splice the on/off switch wires to the ignition? I already spliced into the factory on/off/electric start switch so I didn't need to mount the tusk on/off switch. Also, is your tail light always on when your bike's on/off switch is on? Mine is. But, I did use the factory tail/bake light and spliced into the tusk tail/brake light wiring instead of using the tusk tail/brake light. I like the look of the factory light much better. Any help is greatly appreciated. Thanx.


-- Edited by Terrence R on Monday 14th of April 2014 07:24:55 AM

__________________
1 2  >  Last»  | Page of 2  sorted by
 
Quick Reply

Please log in to post quick replies.


Create your own FREE Forum
Report Abuse
Powered by ActiveBoard