A forum for owners of Yamaha TTR250 trail and enduro bikes!

Members Login
Username 
 
Password 
    Remember Me  
Post Info TOPIC: My first mini restoration


Senior Member

Status: Offline
Posts: 246
Date:
My first mini restoration
Permalink  


Due to a lack of funds it looks like the TTR will be getting just a tart up this year. Once the engine is out I can then start prepping the frame. Started today just got the engine bolts to come out then lift the engine out for the strip down. The bottom mount looks a bit of a pain to remove.  Heres a couple of pictures of today's efforts.

Might take the shock out and give that a clean up while I'm in the mood.  One question though, how do you get the airbox out as it seems really tight in the frame.


John


__________________


Super Guru

Status: Offline
Posts: 1721
Date:
Permalink  
 

If you remove the left hand subframe strut by undoing its two 12mm bolts at either end, the airbox will come out smoothly

__________________

Pete. South Somerset, England.


Senior Member

Status: Offline
Posts: 187
Date:
Permalink  
 

Have fun with the restoration John :)

__________________

Rick, 1995 Blue TTR250 Stockport


Super Guru

Status: Offline
Posts: 8557
Date:
Permalink  
 

Good to see you having a go John!

Some info on airbox removal here wink

Brian

PS Looks like you are running Distanzia tyres. What pressures do you use?


__________________

Exeter, Devon, UK

http://www.ttr250.com  - The one and only dedicated TTR250 FAQ! 
 

TIP: For easy viewing bookmark the "Recent Posts" view - http://ttr250.activeboard.com/p/recent/ 


Senior Member

Status: Offline
Posts: 246
Date:
Permalink  
 

Thanks for the info Pete and Brian, everyday is a school day

__________________


Super Guru

Status: Offline
Posts: 1721
Date:
Permalink  
 

No worries. Yeah nice to see someone else tarting up their TTR. I would do mine but it gets such a battering on the wintery overgrown and stoney lanes of dorset there is not much point really.

__________________

Pete. South Somerset, England.


Senior Member

Status: Offline
Posts: 246
Date:
Permalink  
 

If it wasn't poring oil from the bottom gasket it would have been left well alone lol

__________________


Super Guru

Status: Offline
Posts: 1721
Date:
Permalink  
 

Oh right ha,smile 
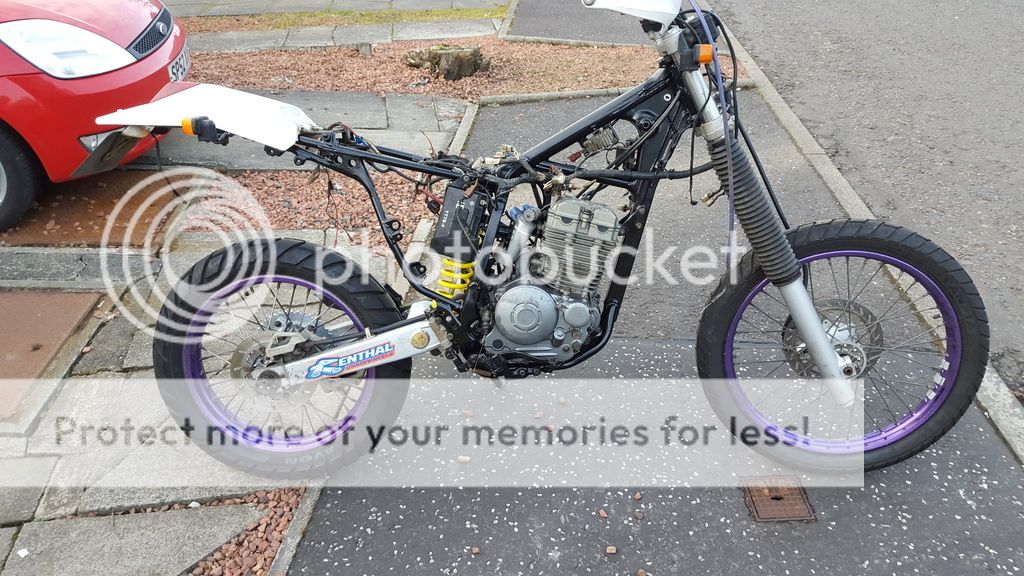
well its good to tart up your bike and show it off isn't it, and yours is used exclusively on road isn't it so you should be able to keep it looking spunky. Eagerly await the next installment of the project.


-- Edited by peteBLUEttr on Tuesday 28th of April 2015 04:41:05 PM

__________________

Pete. South Somerset, England.


Senior Member

Status: Offline
Posts: 246
Date:
Permalink  
 

Spent a wee bit of time on the TTr yesterday, having got it to this level it seems a bit silly not to just go ahead and get the frame done.


It will be easier to get the rust off the frame this way rather than trying to wire brush it down.

John


-- Edited by j180 on Sunday 10th of May 2015 07:03:29 PM

__________________


Super Guru

Status: Offline
Posts: 1721
Date:
Permalink  
 

Cool, what colour frame you gonna have? Should be able to get it powder coated black for around a hundred quid??...

__________________

Pete. South Somerset, England.


Guru

Status: Offline
Posts: 625
Date:
Permalink  
 

+1 Pete, got my frame and shock spring done for £80.

__________________

2004 TTR250. White Brothers E series exhaust, modded airbox, rejetted, 13/48 c&s & many more mods..


Senior Member

Status: Offline
Posts: 246
Date:
Permalink  
 

Going to go black as its easier to touch up, might be getting the coating done cheap through a friend. Will tear it apart on Sunday and see what I'm dealing with then order bits and pieces to get it back together

__________________


Super Guru

Status: Offline
Posts: 1721
Date:
Permalink  
 

TTR frames do look cool in black I have to say. Looking forward to seeing it. 😃

__________________

Pete. South Somerset, England.


Super Guru

Status: Offline
Posts: 2608
Date:
Permalink  
 

Moi aussi, mate! biggrin biggrin

Black is cool and retro. wink

Martyn


__________________

You're never too old to learn something stupid

East Budleigh. Devon


Senior Member

Status: Offline
Posts: 246
Date:
Permalink  
 

Had a couple of hours free today so took the rest of the electrics off today. Some of the screws were a pain to get off but nothing an impact driver couldn't fi

>

Is it possible to get the lock out of the frame.


-- Edited by j180 on Sunday 17th of May 2015 07:23:53 PM

__________________


Super Guru

Status: Offline
Posts: 8557
Date:
Permalink  
 

j180 wrote:


Is it possible to get the lock out of the frame.


Yes - see here and scroll down to my post of 7 Feb 2013 for pics

Once you have loosened the retaining screw try undoing it - should come out in one piece. It is possible to buy a new screw if you damage it beyond re-use.

Brian


__________________

Exeter, Devon, UK

http://www.ttr250.com  - The one and only dedicated TTR250 FAQ! 
 

TIP: For easy viewing bookmark the "Recent Posts" view - http://ttr250.activeboard.com/p/recent/ 


Senior Member

Status: Offline
Posts: 246
Date:
Permalink  
 

Decided to go gloss black Brian, easier to touch up if it gets chipped, also looks nice against the white. Just need to make a shopping list then get things ordered from your good self.

__________________


Senior Member

Status: Offline
Posts: 246
Date:
Permalink  
 

Had a couple of free hours today so got the the front end off and most of the rear as well,only got the linkage to remove 😬 and the headstock lock to remove. The shock could do with a referb as the spring is mancky and roosted, any suggestions of where to get it done (cheaply)

__________________


Senior Member

Status: Offline
Posts: 246
Date:
Permalink  
 

A week update, not got a lot done recently due to back playing up again. Frame is now stripped down except for head races, hopefully get it away soon, then I can start to strip the engine and see how it looks internally.

__________________


Super Guru

Status: Offline
Posts: 8557
Date:
Permalink  
 

If the powder coaters are used to doing bike frames they will have a system to protect the head aces from shot blasting but best to check! The races can be real pigs to get out so don't do that unnecessarily!

Also check the frame carefully for rust and/or cracks before blasting coz that will find any flaws!

Brian


__________________

Exeter, Devon, UK

http://www.ttr250.com  - The one and only dedicated TTR250 FAQ! 
 

TIP: For easy viewing bookmark the "Recent Posts" view - http://ttr250.activeboard.com/p/recent/ 


Senior Member

Status: Offline
Posts: 246
Date:
Permalink  
 

Going to get it blasted first, there are a couple of small holes at the bottom of the frame which will need a spot weld put on. Will find out what else needs doing after that

__________________


Super Guru

Status: Offline
Posts: 8557
Date:
Permalink  
 

Good thinking!

My powder coaters are a way up the M5 from me so I try to do it in one operation.


__________________

Exeter, Devon, UK

http://www.ttr250.com  - The one and only dedicated TTR250 FAQ! 
 

TIP: For easy viewing bookmark the "Recent Posts" view - http://ttr250.activeboard.com/p/recent/ 


Super Guru

Status: Offline
Posts: 1721
Date:
Permalink  
 

Hows the resto going John?

__________________

Pete. South Somerset, England.


Senior Member

Status: Offline
Posts: 246
Date:
Permalink  
 

Hi Pete, I would say slowly tbh lol. Got the frame back which is looking good, managed to get the swing arm on today. Will need to get a list sorted of things I need from Brian, unfortunately have had to spend a fair bit on the house which has slowed progress on the wee bike 😬

__________________


Senior Member

Status: Offline
Posts: 246
Date:
Permalink  
 

Well ordered the bits I need to finally get the rebuild up and running. Just need to work out what to do about chain and sprocket, I could put an expensive set on but I'm running it through the salt covered roads of winter. One question, are the stock gearing and fitting the same on the OE as are on the Blue model.

John

__________________


Super Guru

Status: Offline
Posts: 8557
Date:
Permalink  
 

j180 wrote:

 One question, are the stock gearing and fitting the same on the OE as are on the Blue model.


 I think so - both 14/44 to the best of my knowledge.

Brian


__________________

Exeter, Devon, UK

http://www.ttr250.com  - The one and only dedicated TTR250 FAQ! 
 

TIP: For easy viewing bookmark the "Recent Posts" view - http://ttr250.activeboard.com/p/recent/ 


Super Guru

Status: Offline
Posts: 1721
Date:
Permalink  
 

Always best off buying did/renthal/rk etc in my mind, plenty of lube on the chain and it will be fine. Quick clean with paraffin and brush on occasion.

__________________

Pete. South Somerset, England.


Senior Member

Status: Offline
Posts: 246
Date:
Permalink  
 

So eventually started the rebuild of my OE


A long way to go but at least it is on ins wheels again.

Cheers fae John


__________________


Super Guru

Status: Offline
Posts: 1721
Date:
Permalink  
 

Looking good so far smile


__________________

Pete. South Somerset, England.


Super Guru

Status: Offline
Posts: 8557
Date:
Permalink  
 

As Pete says - looking good already!

My tip would be to put the sidestand on next - makes moving the rolling frame around a lot easier and safer. You don't want to drop it at this stage wink

Brian


__________________

Exeter, Devon, UK

http://www.ttr250.com  - The one and only dedicated TTR250 FAQ! 
 

TIP: For easy viewing bookmark the "Recent Posts" view - http://ttr250.activeboard.com/p/recent/ 


Super Guru

Status: Offline
Posts: 2608
Date:
Permalink  
 

That black frame looks the dog's danglies IMO

I bet you can't wait to finish it and get out on it. smile

Martyn


__________________

You're never too old to learn something stupid

East Budleigh. Devon


Senior Member

Status: Offline
Posts: 246
Date:
Permalink  
 

Cheers for the compliments guys. I'm off Tuesday so will do more to it then.

__________________
Moo


Senior Member

Status: Offline
Posts: 389
Date:
Permalink  
 

That frame looks gorgeous!!

Makes me actually think about getting mine done... it is a little crusty round the rear...

__________________


Guru

Status: Offline
Posts: 625
Date:
Permalink  
 

Yes it looks great. Makes me want to buy another to strip an rebuild.

__________________

2004 TTR250. White Brothers E series exhaust, modded airbox, rejetted, 13/48 c&s & many more mods..


Senior Member

Status: Offline
Posts: 246
Date:
Permalink  
 

Managed to get a wee bit more done today, fitted the side stand after Brian's advice, drilled a new hole in the plate which has stopped the floppiness 😅. Footrests on and rear brake assembly on. Found a bit which I can't remember where it goes lol. Will post a picture later, its a rubber bush that looks like the chain should run over it but can't see it in the manual anywhere. Seals on the front caliper are shot so another order going to Brian later this week.

__________________


Guru

Status: Offline
Posts: 625
Date:
Permalink  
 

The rubber fits on the frame below the swingarm if i remember right.

__________________

2004 TTR250. White Brothers E series exhaust, modded airbox, rejetted, 13/48 c&s & many more mods..


Senior Member

Status: Offline
Posts: 246
Date:
Permalink  
 

Hope I don't have to strip it back down to fit it 😬😬😬 maybe I should have got a Haines manual with pictures lol

__________________


Senior Member

Status: Offline
Posts: 246
Date:
Permalink  
 

Panic over, it fits above the chain to stop it jumping up, thank goodness I took some photos

__________________


Senior Member

Status: Offline
Posts: 246
Date:
Permalink  
 

So not much has happened recently but going to a mates garage on Saturday night to try and strip and hopefully rebuild the engine, as long as everything is OK. A couple of bits of info needed, what are the torque settings for the for the cylinder head and valve clearances. Much appreciation for any advice. My tablet keeps eating the manual every time I switch it off 😧

__________________


Super Guru

Status: Offline
Posts: 8557
Date:
Permalink  
 

The M10 head bolts are 40Nm

Torque settings 1.jpg

For valve clearances, see here and scroll nearly halfway down the page wink


__________________

Exeter, Devon, UK

http://www.ttr250.com  - The one and only dedicated TTR250 FAQ! 
 

TIP: For easy viewing bookmark the "Recent Posts" view - http://ttr250.activeboard.com/p/recent/ 


Senior Member

Status: Offline
Posts: 246
Date:
Permalink  
 

Many thanks Brian. Will take photos and share the progress, can't believe I said progress

__________________


Senior Member

Status: Offline
Posts: 246
Date:
Permalink  
 

Well timing in was actually OK however the valves are very tight so will be ordering some shims from the good people at Totally TTR. It took a wee while to work out you need thiner shims to give more clearance. Everyday is a learning process I purpose smile


__________________


Super Guru

Status: Offline
Posts: 8557
Date:
Permalink  
 

Good to hear it's nearly sorted biggrin

As the "How To" guide says - " If your clearances are too small (below service limit) you will need a smaller (thinner) shim. Swapping to a thinner shim under the bucket will move the bucket farther away from the cam and increase your clearance. If the clearance was too large (above the service limit) you will need a larger shim (thicker shim) In order to move the valve bucket closer to the cam face."  wink

Brian


__________________

Exeter, Devon, UK

http://www.ttr250.com  - The one and only dedicated TTR250 FAQ! 
 

TIP: For easy viewing bookmark the "Recent Posts" view - http://ttr250.activeboard.com/p/recent/ 


Senior Member

Status: Offline
Posts: 246
Date:
Permalink  
 

It's certainly been a steep learning curve, the base gasket was indeed completely shot. On the plus point though everything is really clean in the engine with no scoring on the bore and the valves are tight with no leaks when closed. It has been running a bit rich which was apparent with carbon build up on the piston crown. Nice and clean now, probably didn't help that the inlet stub was torn but the new one should make it run better.

__________________


Senior Member

Status: Offline
Posts: 246
Date:
Permalink  
 

Well things are at last moving forward, the engine is rebuilt and back in the frame.

20160227_160418.jpg

Next step is to tackle the electrics which i'm going to take my time at. As you'll see from the photo's I had to improvise stuff around the garage to do the rebuild.

s1224.photobucket.com/user/180slayer/media/20160105_182454_1.jpg.html">i1224.photobucket.com/albums/ee365/180slayer/20160105_182454_1.jpg">
s1224.photobucket.com/user/180slayer/media/20160206_205527_1.jpg.html">i1224.photobucket.com/albums/ee365/180slayer/20160206_205527_1.jpg">
s1224.photobucket.com/user/180slayer/media/20160227_160418.jpg.html">i1224.photobucket.com/albums/ee365/180slayer/20160227_160418.jpg">


__________________


Super Guru

Status: Offline
Posts: 8557
Date:
Permalink  
 

Clever use of the Workmate wink


__________________

Exeter, Devon, UK

http://www.ttr250.com  - The one and only dedicated TTR250 FAQ! 
 

TIP: For easy viewing bookmark the "Recent Posts" view - http://ttr250.activeboard.com/p/recent/ 


Senior Member

Status: Offline
Posts: 246
Date:
Permalink  
 

Electrics run now, couple of broken connections which I'll fix when I get some crimps and butts from work tomorrow. One issue I do have is that the from sprocket is not for coming off. I read that another guy had the same issue. I tried using a flat screw driver but to no avail. Will see if I can get a gear puller or similar. Hopefully my next post will be of a running bike

__________________


Senior Member

Status: Offline
Posts: 246
Date:
Permalink  
 

A few hours of swearing in the garage helped get all the electrics working apart from the new headlight, that's Sundays job. There were a couple of breaks in some of the wires, I had 3 indicators for a while but now have that sorted. Bought a gear puller from work for a tenner, using this took the sprocket off in 30 seconds. Finally feel end is in sight.

__________________


Senior Member

Status: Offline
Posts: 246
Date:
Permalink  
 

Headlight on and it looks really good on. Rear brake bled and working, however the front is a pain. One of the pistons is caught on the seal, I have new ones ready, even taking the line off the master cylinder I can't get it to pump fluid through. Will get a friend to come over to see if I'm doing something wrong.


__________________


Super Guru

Status: Offline
Posts: 8557
Date:
Permalink  
 

Bleeding the front brake can be a problem and I think I have tried all the tricks sometimes successfully other times having to adopt extreme measures (including getting Mrs TTR to help!) filling the hose and caliper with fluid, bleeding at each of the hose banjo bolts etc no

I wish I had discover this bit of kit earlier - makes it so much easier biggrin

Brian


__________________

Exeter, Devon, UK

http://www.ttr250.com  - The one and only dedicated TTR250 FAQ! 
 

TIP: For easy viewing bookmark the "Recent Posts" view - http://ttr250.activeboard.com/p/recent/ 

1 2  >  Last»  | Page of 2  sorted by
 
Quick Reply

Please log in to post quick replies.


Create your own FREE Forum
Report Abuse
Powered by ActiveBoard